I thought it would be cool to give the opportunity to the random internet user to contact me if they so wanted. Turns out it’s pretty easy, so here’s a tutorial on how to set up a contact form on Jekyll using Formspree.
What’s Formspree?
It’s a HTML form generator, that transfers the form’s answers to your email address. Plus it’s free and no registration is required.
There is also a paid plan for additional features, but until 50 messages a month, I guess the free plan is enough for most uses.
Basic setup
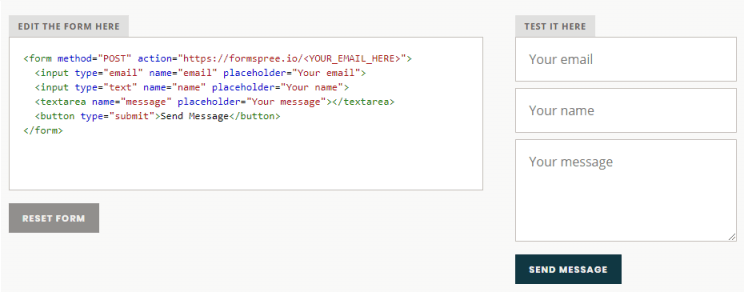
Formspree provides a test environment where you can tweak your HTML before including it on your website.
<form method="POST" action="https://formspree.io/<YOUR_EMAIL_HERE>">
  <input type="email" name="email" placeholder="Your email">
  <input type="text" name="name" placeholder="Your name">
  <textarea name="message" placeholder="Your message" rows="3">
  </textarea>
  <button type="submit">Send Message</button>
</form>
You simply have to include your contact email on line 1
(<YOUR_EMAIL_HERE>), and the form works!
Note: You’ll have to first activate each domain you set up your contact form on (through an activation link sent to the email address provided), so it’s no use adding your friend’s email for a prank 😉
You can also customize the placeholder of your
input questions, or add any other question, like:
<input type="text" name="subject" placeholder="Message's subject">
Integration with Jekyll
You could now copy/paste the HTML code and include it any .html file of your
blog.
However, the best way to do that would be to insert this code into an
_includes file, and create a dedicated _layouts. This way, you’ll be able
to edit the page with the contact form using a nice and clean Markdown! 💙
First, let’s create a new layout in your root/_layouts folder and name
it contact.html.
You’ll notice that this layout is based on the default page.html layout,
and this allows us to do the following:
- Automatically use the title attribute to create a
<h1> - Type your content and it will appear before the contact form
Note: I’m using the Hydeout Jekyll template, which may have different layout names than your own.
Then, we’ll create the contact-form.html mentioned in the previous code
excerpt. Place it in the root/_includes folder. This file will host the
HTML you generated through Formspree, which in this case, is:
<form method="POST" action="https://formspree.io/<YOUR_EMAIL_HERE>">
  <input type="email" name="email" placeholder="Your email">
  <input type="text" name="name" placeholder="Your name">
  <textarea name="message" placeholder="Your message" rows="3">
  </textarea>
  <button type="submit">Send Message</button>
</form>
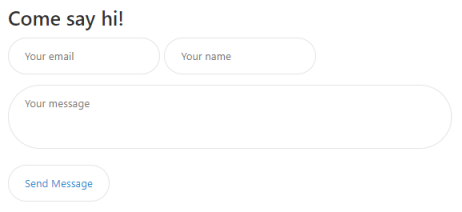
You now have a working contact layout! 🌈
To use it, create a new post, and insert layout: contact in the YAML front
matter. You can now type any Markdown content you want, and your text will be
displayed before your contact form!
Final Adjustments
However, in my case, the Your Message (textarea) part was displayed poorly,
because the Hydeout template did not have any CSS for textarea.
I therefore had to create some styling in order to homogenize the form. I’ve
included the following SCSS in my assets/css/main.scss:
input[type="text"], input[type="email"], input[type="search"],
input[type="submit"], button, textarea {
  padding: 1em 1.5em;
  border: 1px solid #e5e5e5;
  border-radius: 300px;
  margin-bottom: 1em;
  font-family:  -apple-system, BlinkMacSystemFont, "Segoe UI",
                "Roboto", "Oxygen", "Ubuntu", "Cantarell",
                "Fira Sans", "Droid Sans", "Helvetica Neue",
                Arial, sans-serif;
}

textarea { width: 73%;  resize: none; }
I’ve also added rows="3" in the contact-form.html in order to widen the
text area. Bear in mind that all these changes are pretty specific to the
Hydeout template so you’ll probably have to tweak your own CSS in order
to have a coherent style.